Using the Fuji X-Pro2 at Zion and the Red Cliffs of Southern Utah

Most travel photographers try to stick to a light, all-in-one solution like a zoom lens. The problem with most zoom lenses is that you give up image quality and the speed of the lens for the sake of portability. This is why when I was invited by and partnered with Inside Out Media, AToZion, and Travelmindset to explore southern Utah, I used it as an opportunity to travel with a light kit of a Fuji X-pro2, and two prime lenses: a 14mm f2.8 and 35mm f2 lens (21mm and 50mm full frame equiv).

The Red Cliffs
The Red Cliffs, Fujifilm X-Pro2, 35mm, 1/125, f/16, ISO 100

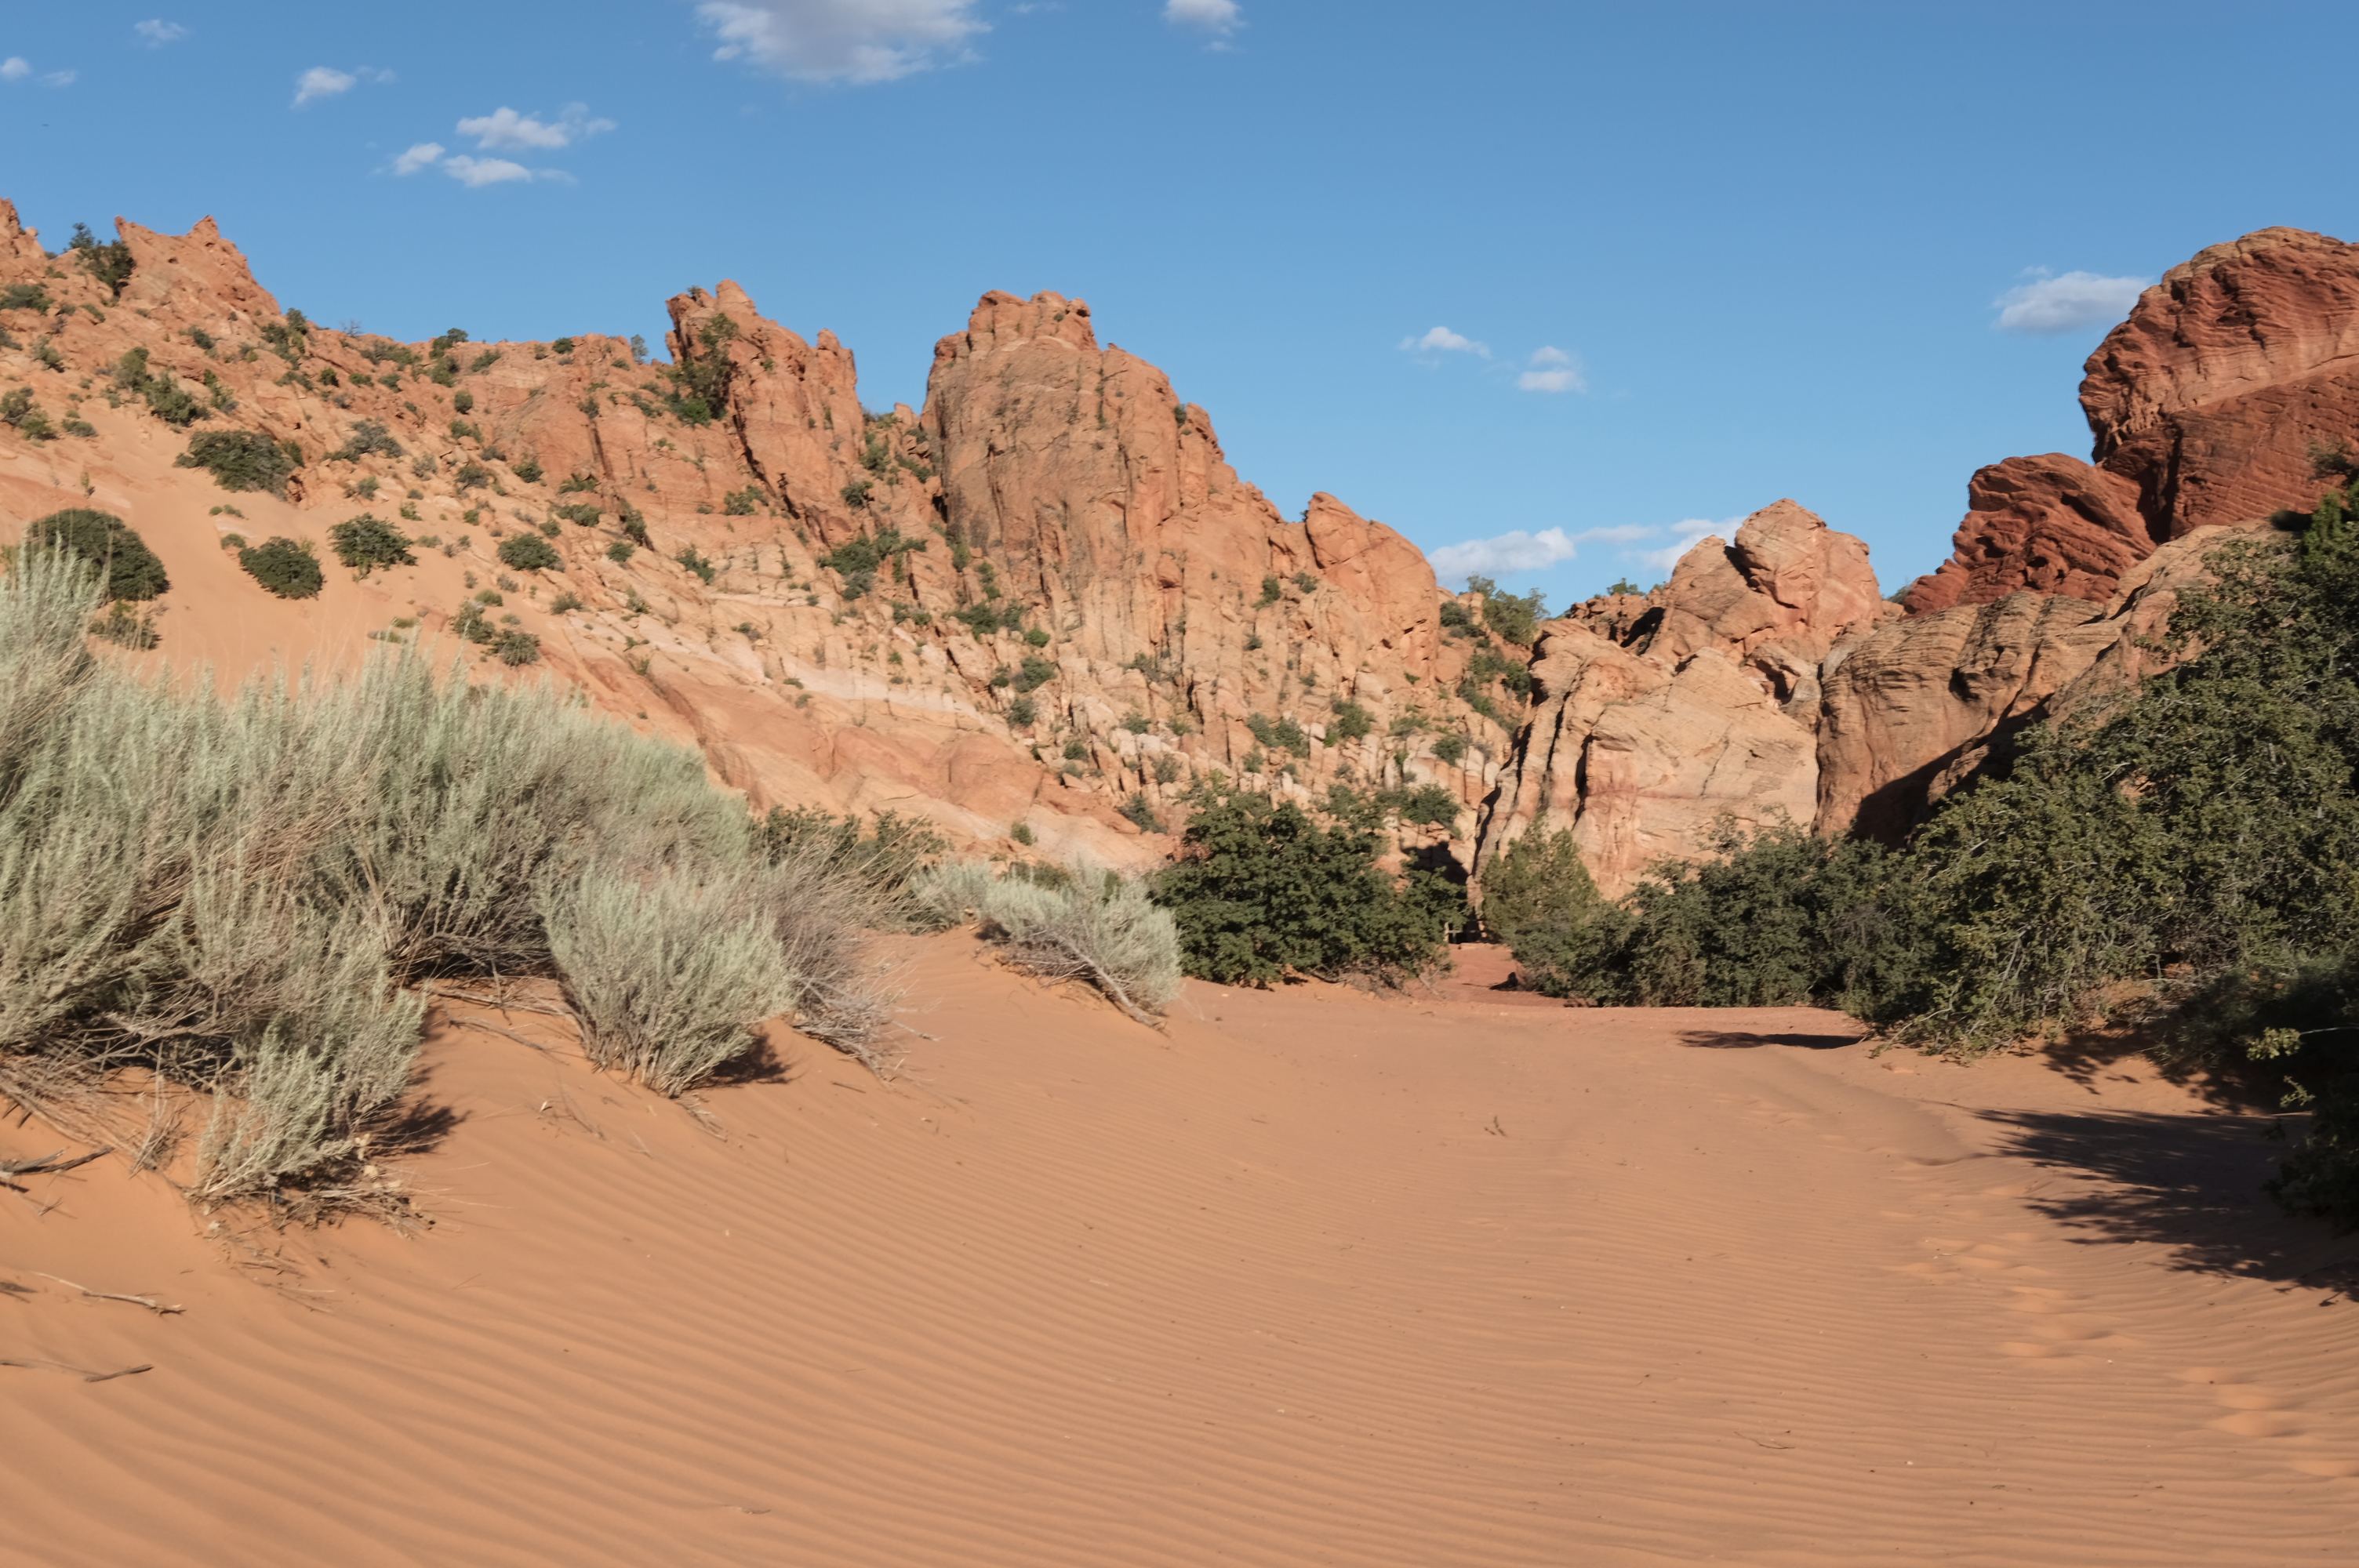
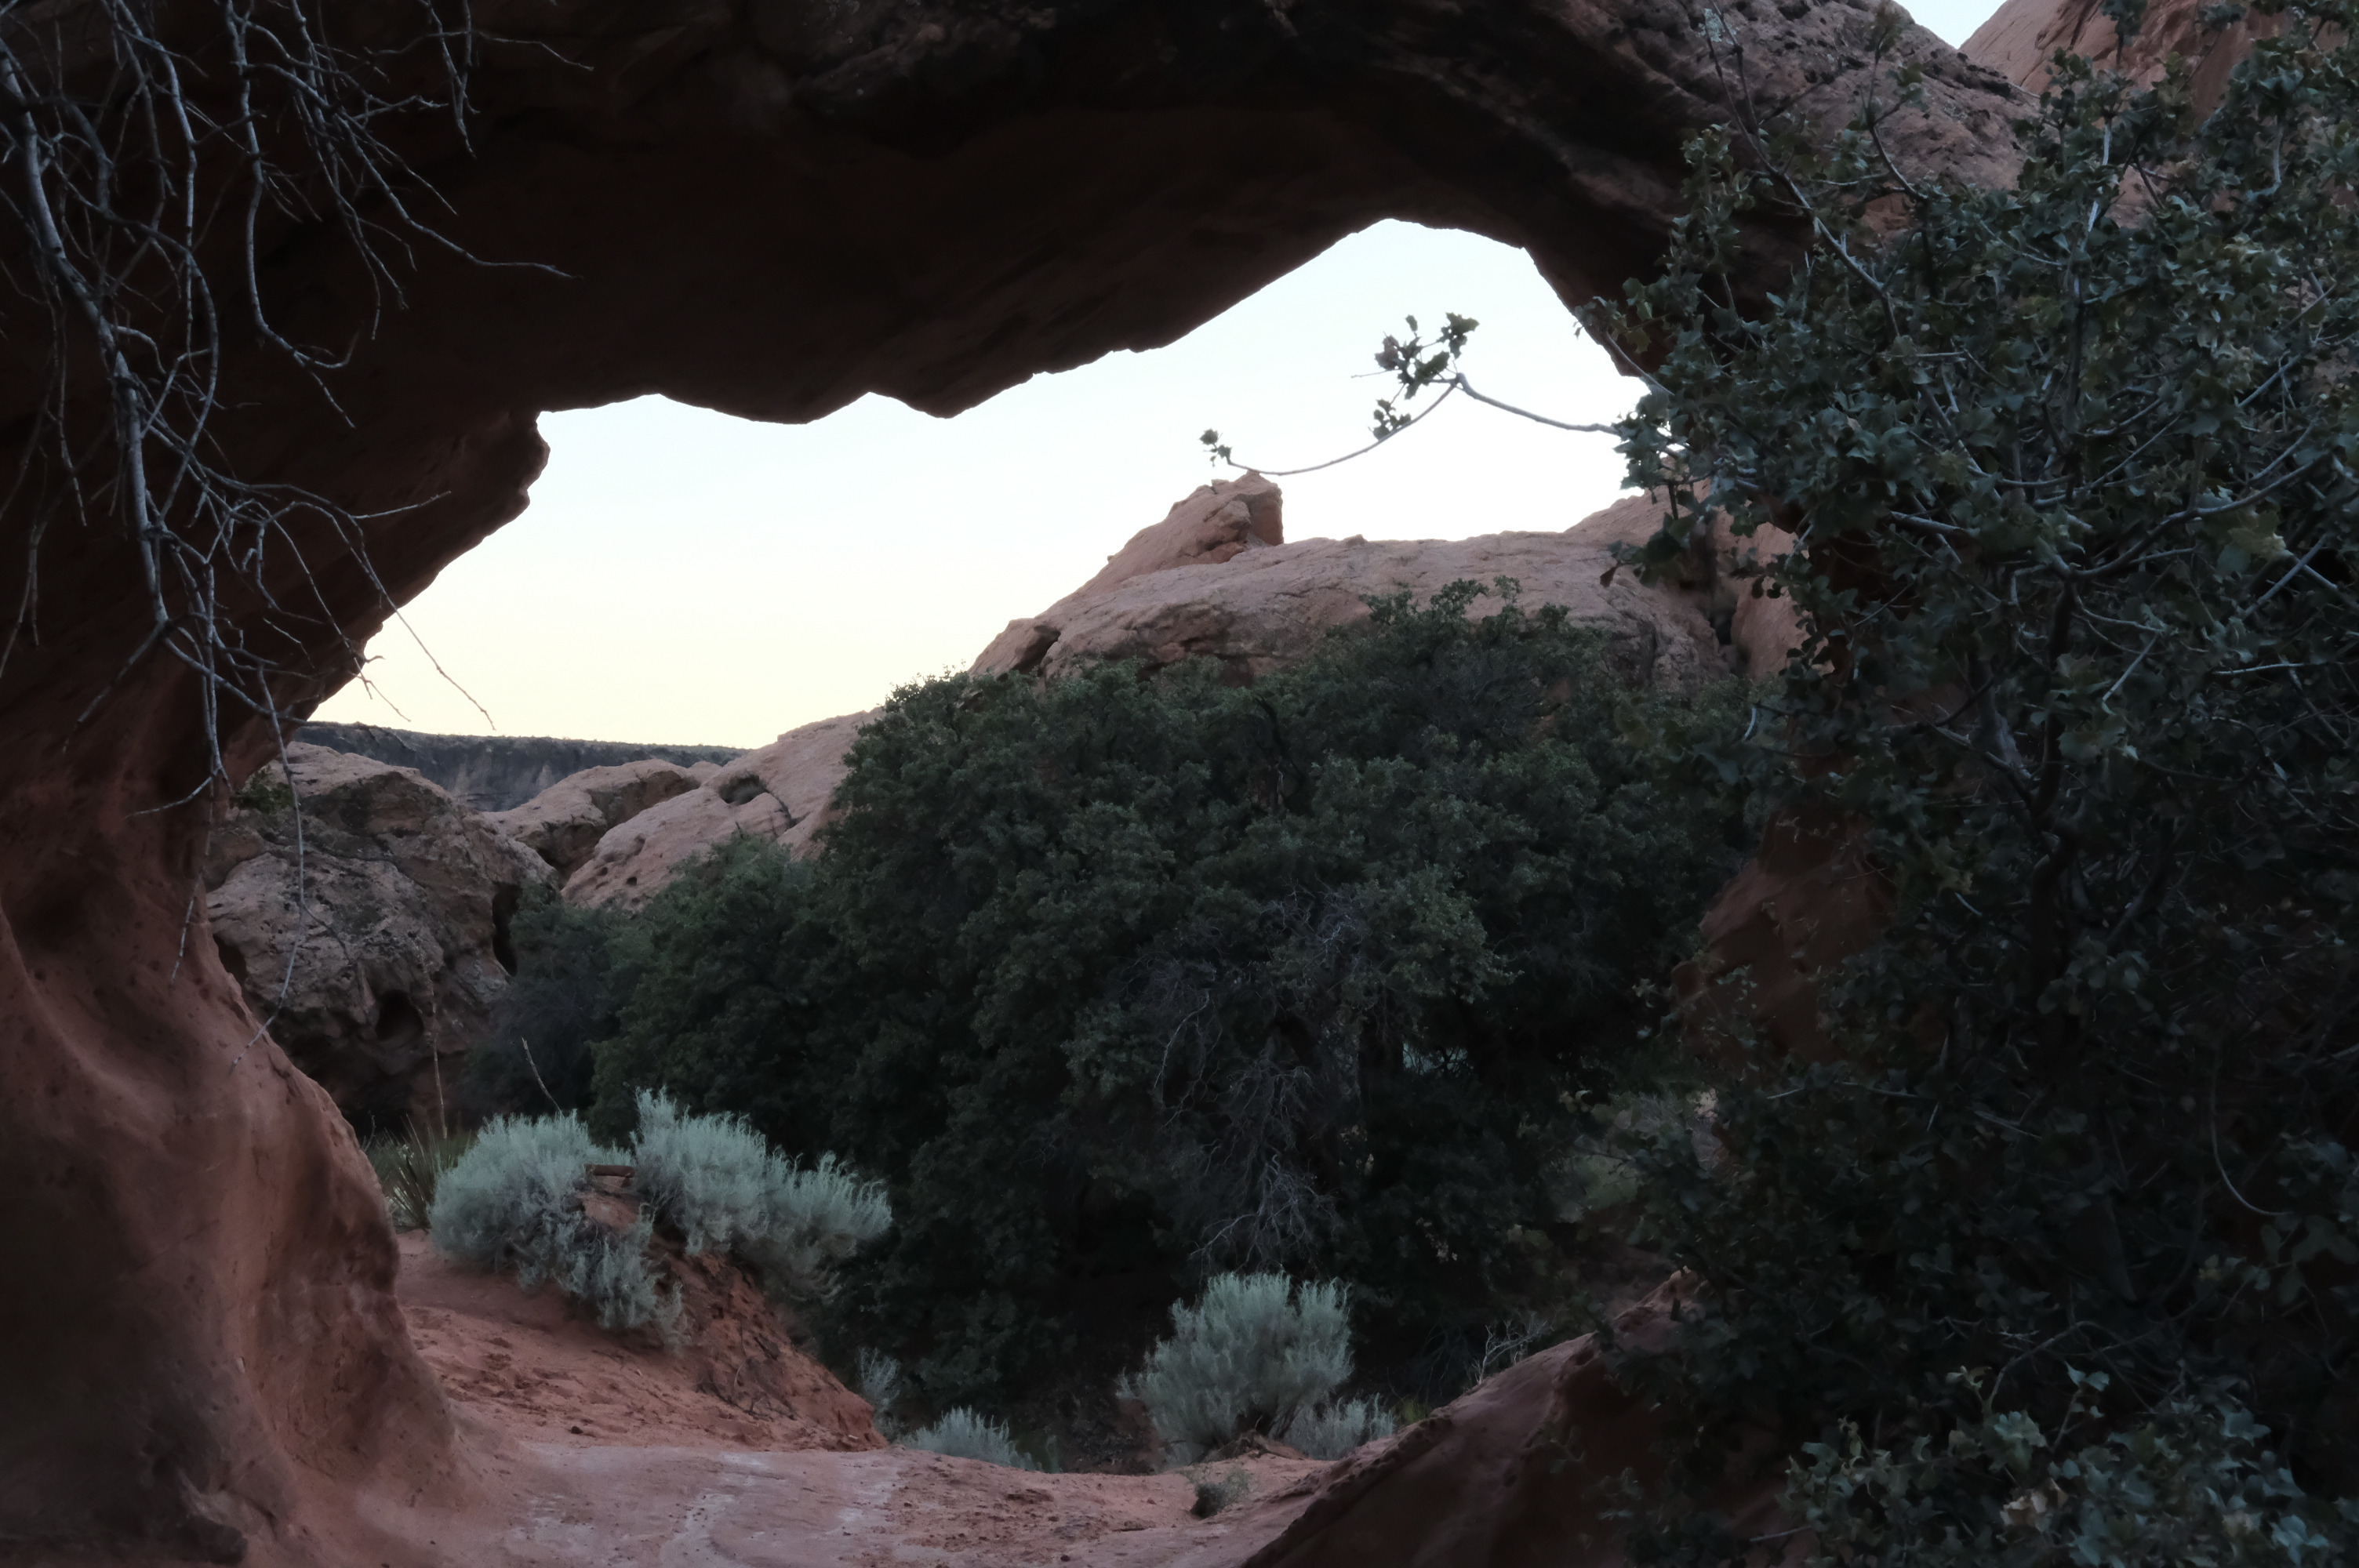
The first spot I checked out was with a group at an Instameet at the Red Cliffs. We hiked from the Sand Cove Trailhead to Primitive Camp, and then onward to the Babylon Arch. There’s more info about this hidden gem on the “Visit St. George” website. Finding the arch was a bit difficult, so I’ve supplied the exact GPS coordinates as well as a link to Google maps here:

N 37 12.145′, W 113 20.095′

The Babylon Arch, Fujifilm X-Pro2, 35mm, 1/125, f/16, ISO 100

The great thing about the Red Cliffs is a spot called Primitive Camp. You can basically hike or 4 wheel drive your way here and camp without a permit. The only amenities are a fire pit, but what else do you need when surrounded by so much beauty.

Campfire at Primitive Camp, Fujifilm X-Pro2, 35mm, 1/60, f/2, ISO 12800

After exploring, you can build a campfire and enjoy s’mores!

While exploring the Red Cliffs, I found that the X-Pro2 handled really great. The first thing that struck me was how light it was. Also, thanks to weather sealing on the camera and 35mm f2 WR lens, I didn’t worry about getting dust or sand into my gear at all. The ISO range was more than enough for capturing scenes during the day and night.

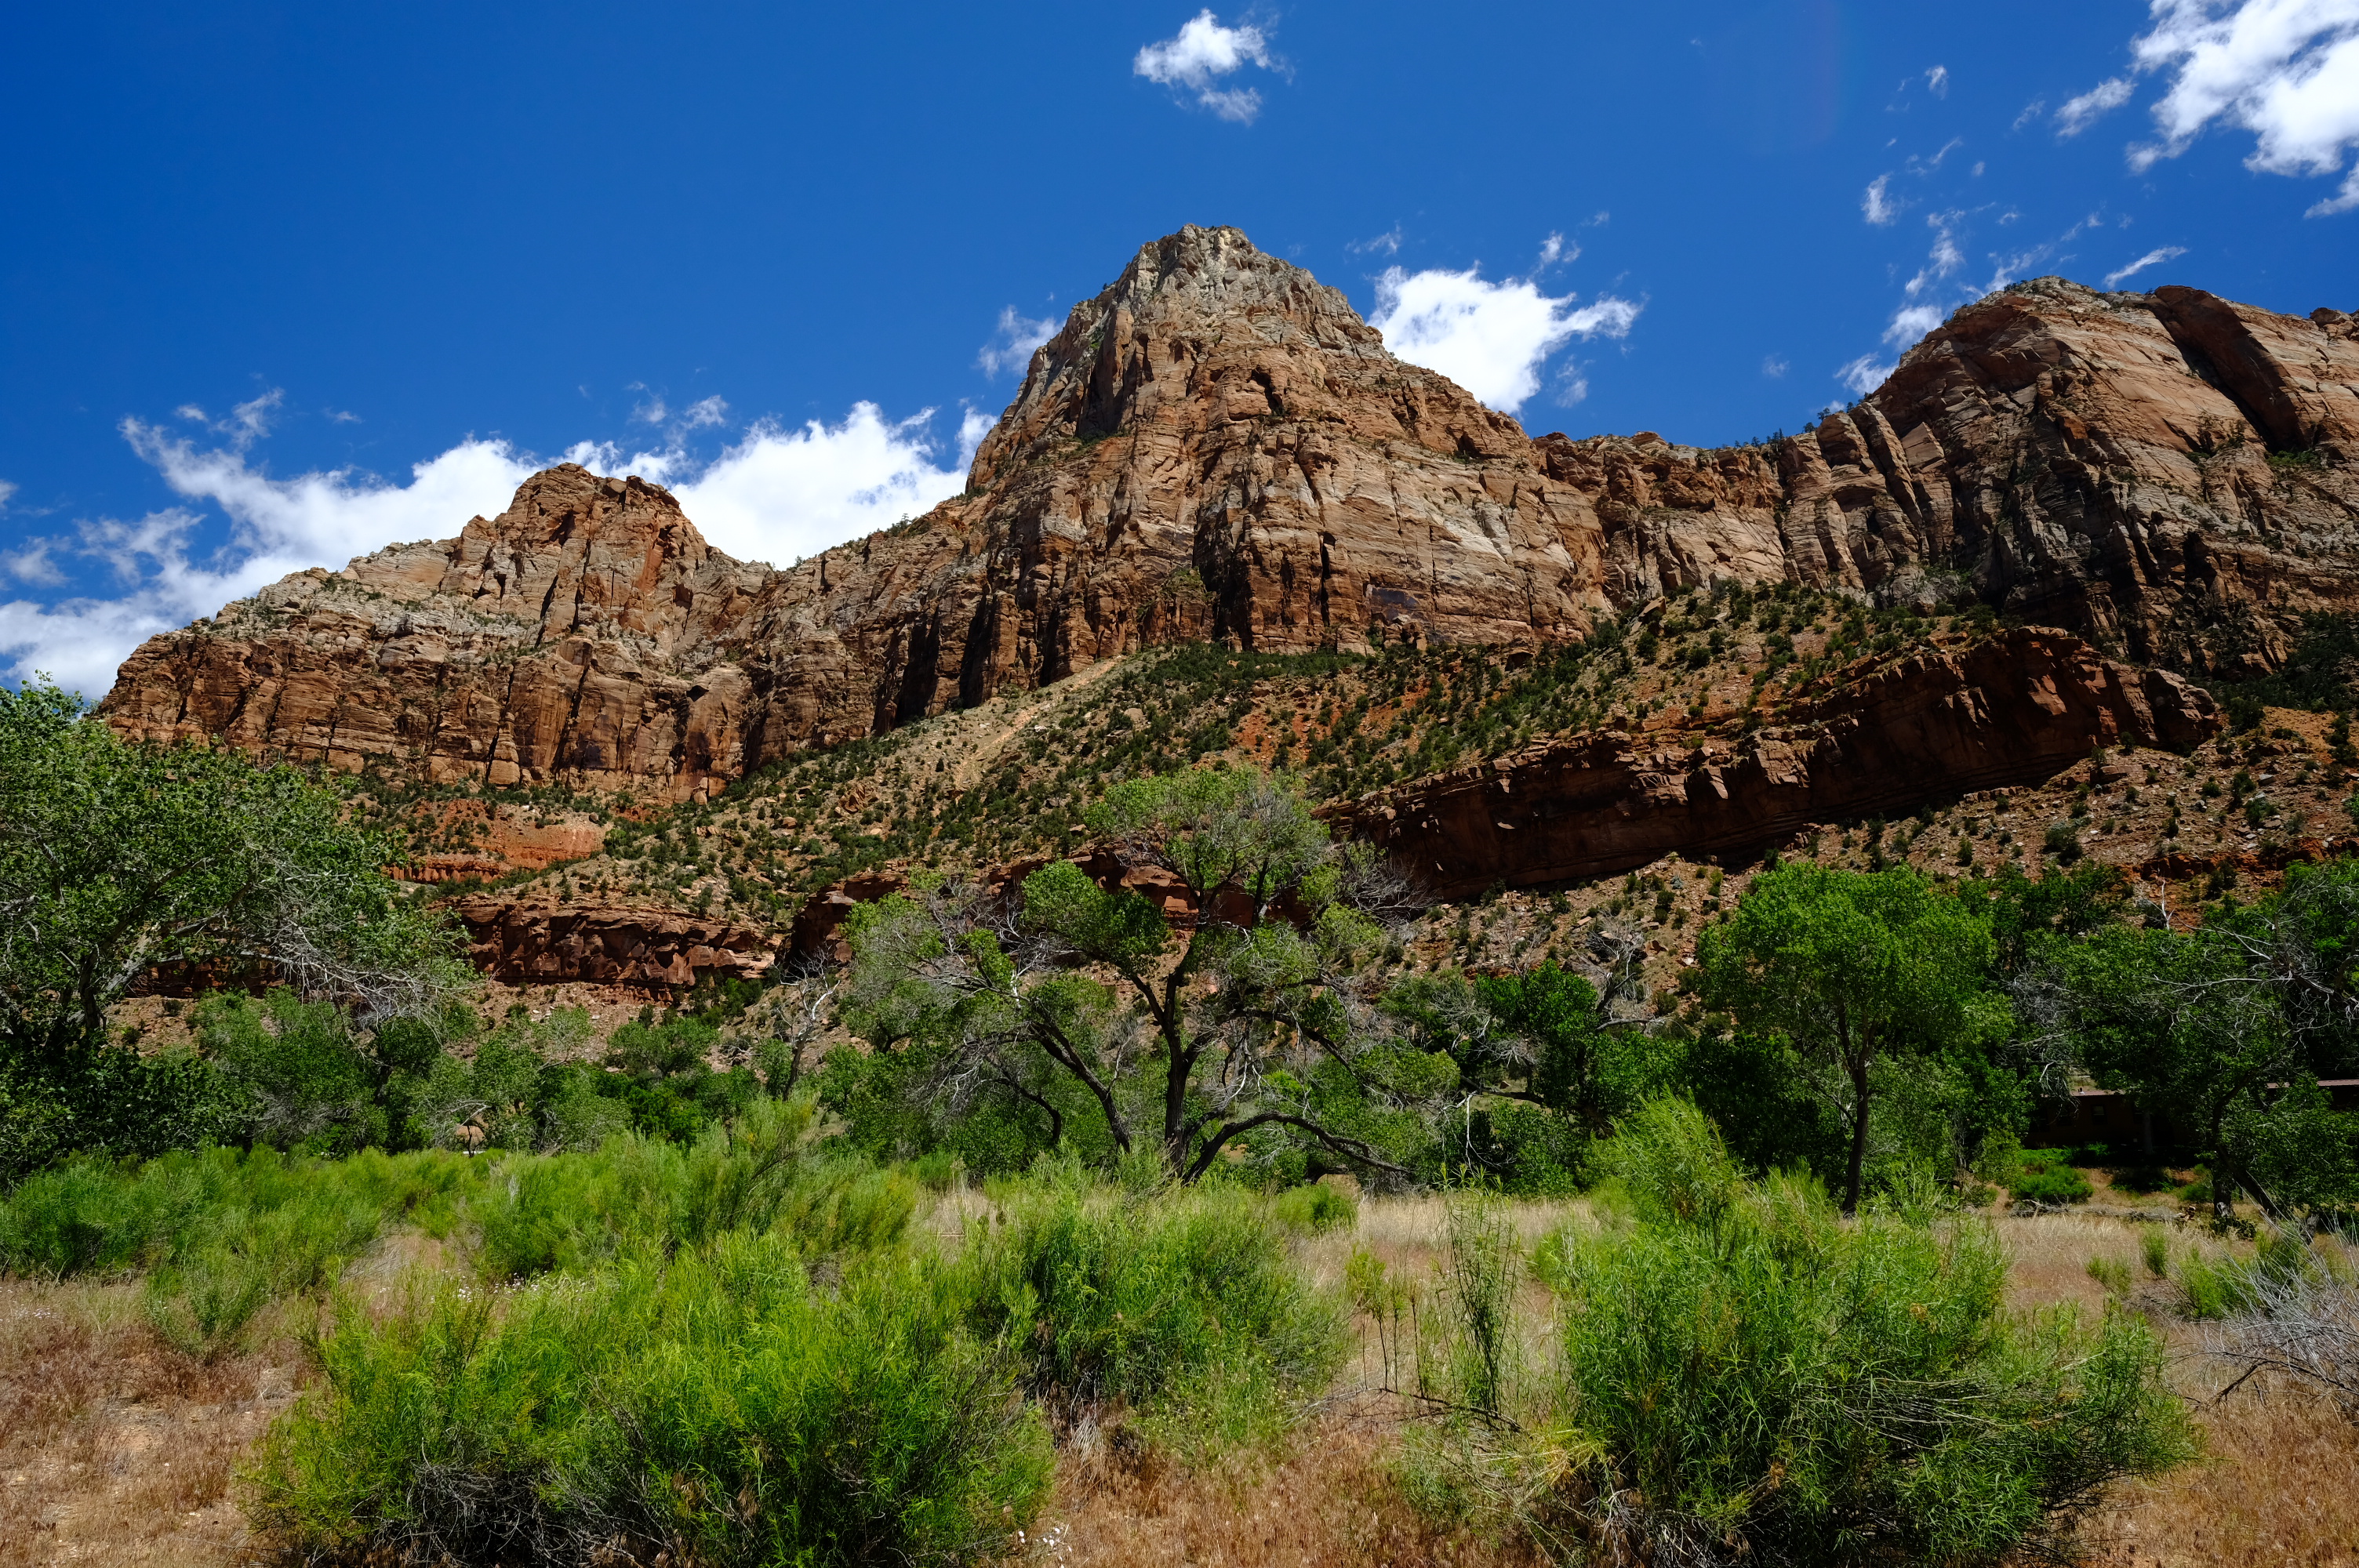
During my stay in the St. George area, I camped most of the time in Zion at South Camp, and stayed at St. George Inn & Suites at the start and end of my trip. I wanted to test out my new 14mm f2.8 lens for astrophotography. In hindsight, the 16mm f1.4 would have been the better choice. It lets in more light, but I also wanted something wide enough to give the user more of a feeling of being there.

Getting a campsite without reservations is quite the ordeal in Zion. I showed up at South Camp at around 5:30am thinking I would be first in line. I was totally wrong. There were already 30 people ahead of me. Camp registration opens at 7am. After waiting 3 hours, I luckily got a spot!

After setting up camp, I explored the valley a bit.

Fujifilm X-Pro2, 14mm, f/8, 1/125 with a polarizer

When it got to be night, I ventured along the Pa’rus trail until I found a spot by the Virgin River.

Fujifilm X-Pro2, 14mm, f/2.8, 20s, ISO 3200

To learn more about St. George and its environs, check out the Visit St. George website.

Crowd Sourced Travel with Letskedaddle

On Black Friday, instead of shopping, I decided to #OptOutside along with REI and Letskedaddle. I didn’t buy anything that day and instead decided to enjoy the great outdoors with like-minded folks at Point Reyes National Seashore.

What is Letskedaddle? It is crowd sourced travel. Assume you want to get to Yosemite on a certain date. You announce your intention on Letskedaddle and if enough people want to go on that date (at least 10), your trip and everybody else’s gets funded. It’s a cheap and more convenient alternative. It can take 10 to 12 hours to get to Yosemite if you take public transportation from San Francisco.

boarding the bus to adventure
Crowd Sourced Travel

On Black Friday, the crew I was with ended up going to Point Reyes. We boarded at REI in San Francisco and in 90 minutes were at a trailhead leading to creeks, forests and coastal views. The forest was so lush and green! It was quite the treat to get away from the city.

Lush greenery awaits!
Lush Greenery

Are you looking for a great way to get to hard to reach places with friends? Check out Letskedaddle.

A Review of the Mamot Plasma 30 Sleeping Bag

I felt a bit apprehensive before purchasing the Plasma 30 bag. It’s purpose seemed really narrow: Hikes where the temperature might be in the upper 60s and where the nights could plunge to around freezing, an alpine bag for early spring and late fall.

When I hiked to Discovery Point in Crater Lake National Park, I was glad I had this ultralight and warm, down bag. The temperature was around 32 degrees, and I needed no more than my long-underwear and baselayer to keep warm. I took advantage of such well thought out and luxurious features as the draft collar, and hood. At 32 degrees I was very warm.

At 1.44 pounds this is also the lightest 3 season bag I’ve ever used. In off-season Alpine hikes, I’m very confident this is the bag to use.
For winter, I would use the Lamina Z Torch sleeping bag which weighs 3.94 pounds. It’s rated to 5 degrees Fahrenheit, and kept me very warm during New Year’s Eve in Yosemite when it was around 9 degrees.

Should you buy a Marmot Plasma 30 Bag? I think it’s the sort of bag for ultralight-backpacking from Spring to Fall.

Backcountry Camping at Crater Lake National Park

Backcountry camping affords the flexibility, freedom and solitude that is often lacking with car camping or just camping at a designated campsite. This weekend, I got to enjoy backcountry camping with a friend at Crater Lake National Park.

First, you get your backcountry permit from the Visitor Center. Some guides tell you you can do this at the Rim Village. This is no longer true. After that you can camp anywhere that is a mile away from the nearest paved road, and out of sight of any trails. A popular route is hiking, or in our case, snow shoeing to Discovery Point.

Crater Lake at Sunset from Discovery Point
Crater Lake from Discovery Point, April 2016

The snowpack is its deepest (approx. 117 inches average) in March, and can last into July. Personally, I feel March and April are the best times to go because the southern approach is open unless there’s a snowstorm.

Setting up camp is encouraged close by trees where you can be protected from the wind, snow and/or rain. You cannot camp at the rim of the crater. Also, make sure you are prepared for the cold nights that can go to below freezing. After you’ve set up camp, you can enjoy the stars.

Milky Way from Crater Lake

Traveling Light

I’ve been using my Langly Alpha-Pro bag to travel light. They say that the top compartment is good for a day hike. This is true, but I found a way to make it a great 3 day weekend bag, or for an extended week trip where you’re okay with limited clothing options.

IMG_6065.JPG

Part of traveling light has involved using clothes that dry in 4 to 8 hours.

My clothing packed into my top compartment consists of:

Not packed into my bag but what I’m already wearing is

  • shoes,
  • jeans,
  • socks,
  • undies,
  • shirt and
  • jacket.

This is ideal for traveling in places that are 50 degrees Fahrenheit and up.

For winter, I just layer on a winter jacket with inner and outer shell, gloves, long underwear, and substitute boots for shoes, but this is a pain to travel with.

I bring two 35mm film canisters worth of laundry detergent for a week and pack them in two ziplock bags.

I wash one pair of underwear each night, and the shirt and smart wool socks after 3 uses.

To dry them, I ring them out, wrap them in a hotel towel and stomp out the moisture. I then hang them wherever it is convenient.

The briefs can dry in 4 hours when it is dry and warm. The socks and shirt take 8 hours but you might have to attach them to the outside of a backpack if it is humid or not that warm out.

For the jacket and jeans, I’ve just relied on Febreeze to deodorize them. I’ve been looking into quick dry jackets and pants, but haven’t researched that yet.

With the clothing setup above you will be able to do a week of travel. You might be able to stretch it out to two weeks if you can find a laundrymat to take of the jeans and jacket.

I hope this helps.

How do you travel light?